The whole business of stretching watercolour paper is quite fiddly. My first attempts failed, as the masking tape I used to tape the soaked sheets to any portable flat surface I could find (the glass on framed paintings, a rubber cutting board, an old cupboard door and two baking trays!) failed to stick. So back into the bath went all the (very buckled) paper, and I tried again with that unbelievably sticky gummed artists tape. For the record, even that doesn't stick to non-stick baking trays!
Anyway, this morning I attacked a few of my stretched sheets with reckless abandon and painted some big splodgy things that are supposed to be clouds. The results are pretty ugly, though there are little sections that look slightly pleasing. The thing I liked best was that when I scanned one of these sections on my amazing super-dooper new scanner (Epson Perfection V500 Photo... mmmmm...), you could see all the lovely textured tooth of the paper in the scanned image.
This got me thinking about a way to tweak my Hamlet backgrounds a little. Of course they are hand-painted, but they're done on W&N's lovely smooth cartridge - and when scanned, the colours look just a little bit flat. So this afternoon I made my first ever texture to use in Photoshop, by scanning a blank sheet of that beautiful Arches watercolour paper.
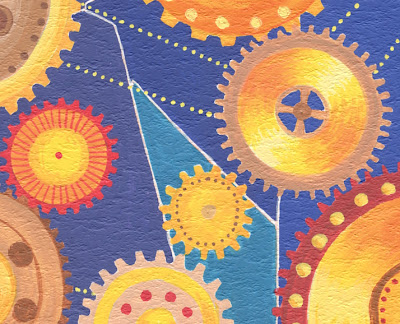
I applied the texture to a test scan of one of the Hamlet backgrounds, and - presto! - the result looks like this (note - this is enlarged. The actual image, and therefore the grain, is smaller):

I'm delighted with the effect - it just adds a nice organic touch to the image, and reminds you that it is made of paint on paper. I'll probably play with the direction of the texture lighting a bit, too, and see what looks most natural. Funny how a layer of technological intervention is required to create an organic, "real" feeling of paint, when the original image most definitely is paint on paper!
It's a huge time-eater, this business of tweaking pictures in Photoshop. I actually try and avoid doing it wherever possible, because the temptation can be to massage everything until it either melts into goo or looks terribly artificial. The trick is knowing when to stop - preferably sooner rather than later.
Seasoned photoshop people probably know how to make textures already, but for those who don't (like me until 15 minutes ago), it is super easy:
- Scan your textured material, or take a photo. I scanned my paper at 600dpi, in colour, and lowered the brightness a bit.
- Convert it to grayscale.
- Save it as a psd file.
- To apply the texture to a layer in another image, have that image open in RGB mode. Go to Filter > texture > texturiser. In the drop-down of texture styles, pick "load texture" and just browse and find your texture. Then you can fiddle with the depth, lighting etc
Now I think it's time to put those baking trays to the purpose for which they were intended - I'm going to make a batch of vegetarian pasties!


2 comments:
With chickpeas?
Mmmmm...
Hey! I'd never done that! (i.e. make my own structures).
I have some very interesting paper in my paper cabinet that must be positively screaming "idiot!" at me for not using it.
Thanks for the tip.
Ho, and only food will occasionally stick on non stick baking trays.
Post a Comment